![]()
![]()
![]()
You can add and manage your DNS records from your WHM account for customers who have Cloud/Dedicated/Reseller Hosting packages.
Step 1
Log into your WHM account and search for DNS Functions.
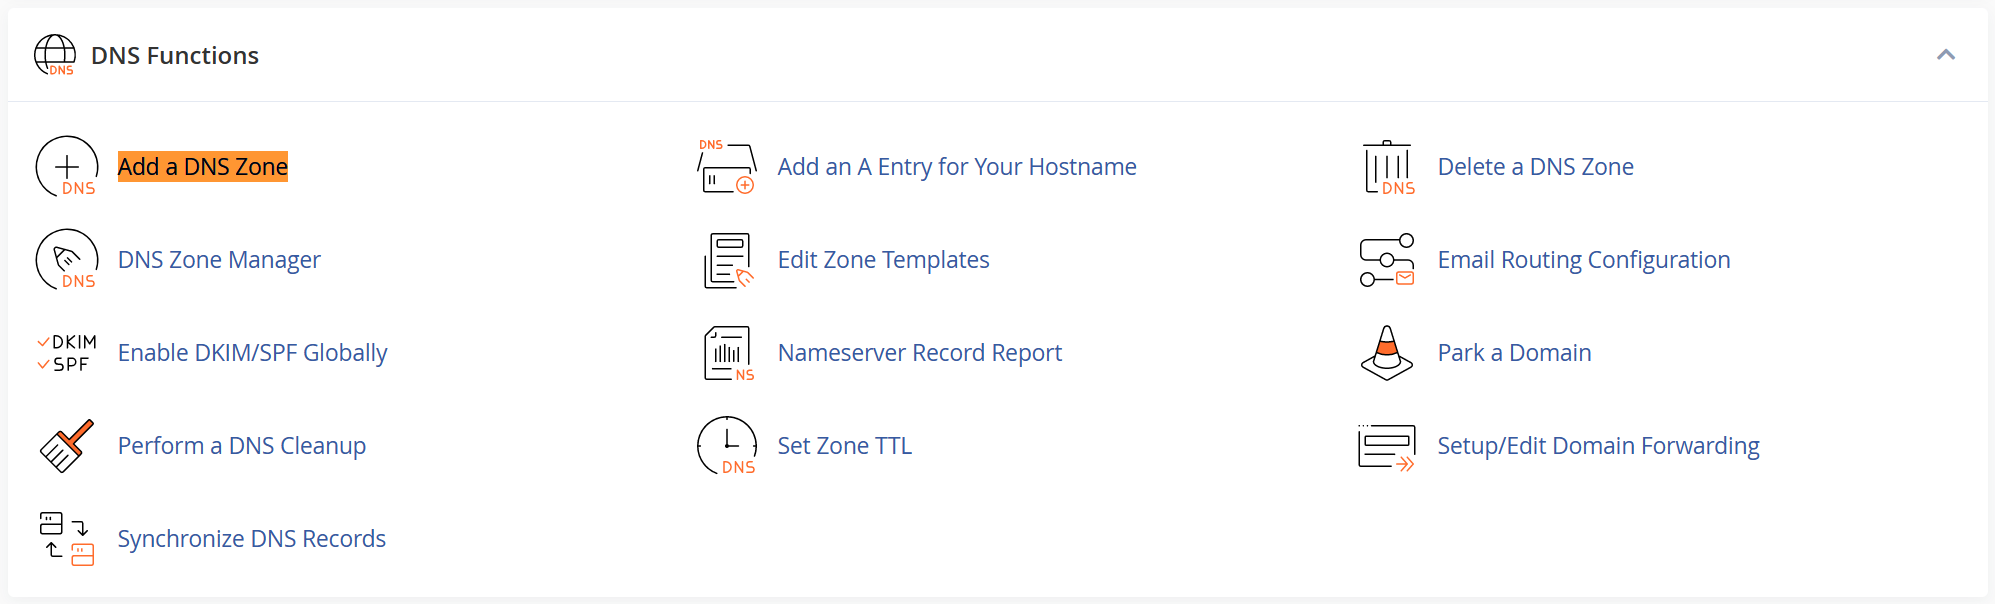
Step 2 - Adding a DNS Zone
Click on the icon Add a DNS Zone.
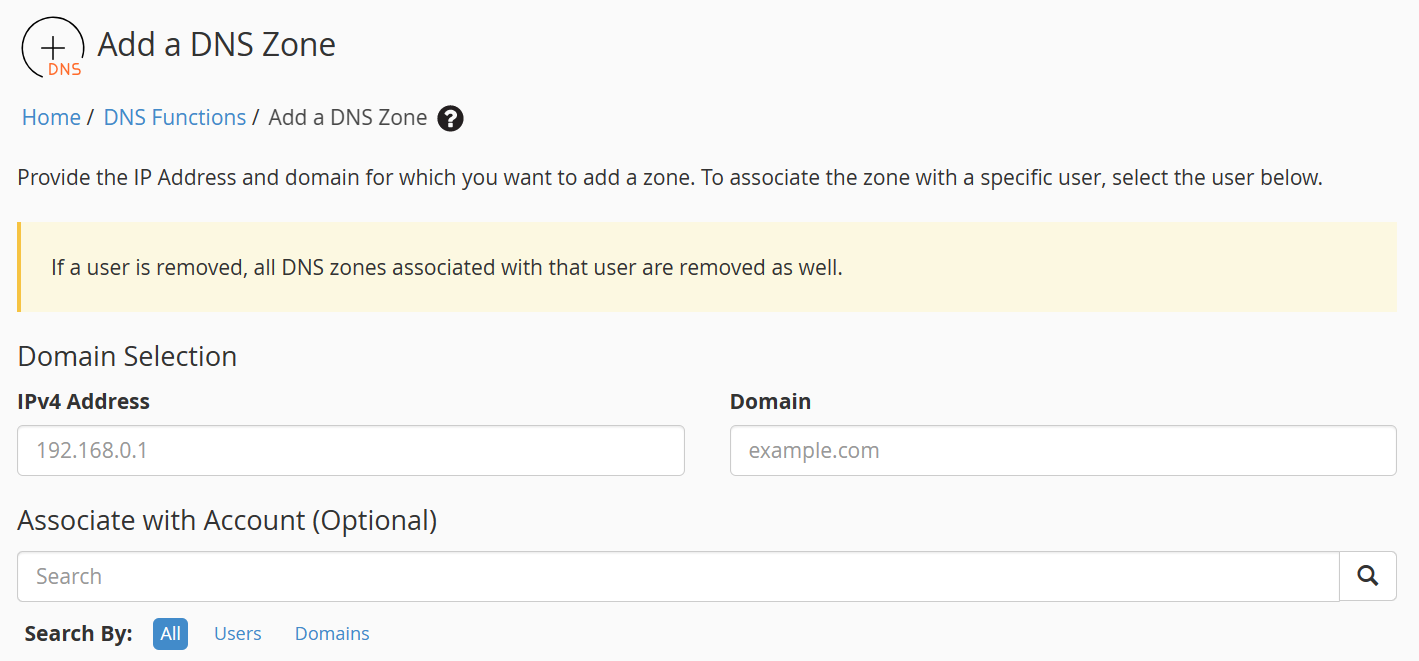
Fill in the IP address and Domain name. There is a list of accounts below, if you see the domain name from this list you will not need to enter the domain in the Domain box.
Click Add Zone.

Step 3 - Editing DNS records
Back on the DNS function page, click on DNS Zone Manager. Click on Manage to edit the DNS records.
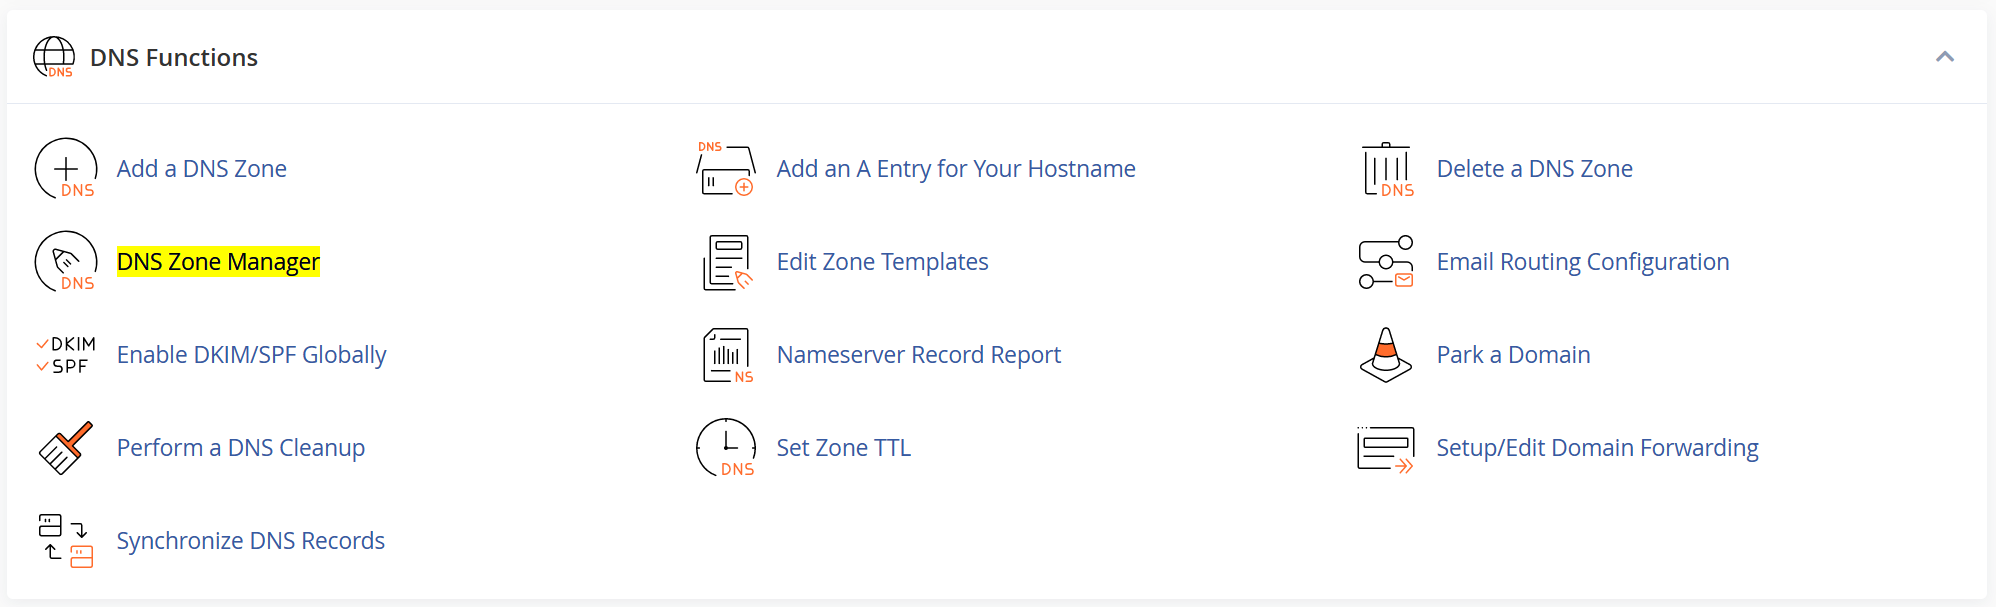
Click on Manage to edit the DNS records.

Step 4 - Deleting DNS Zone
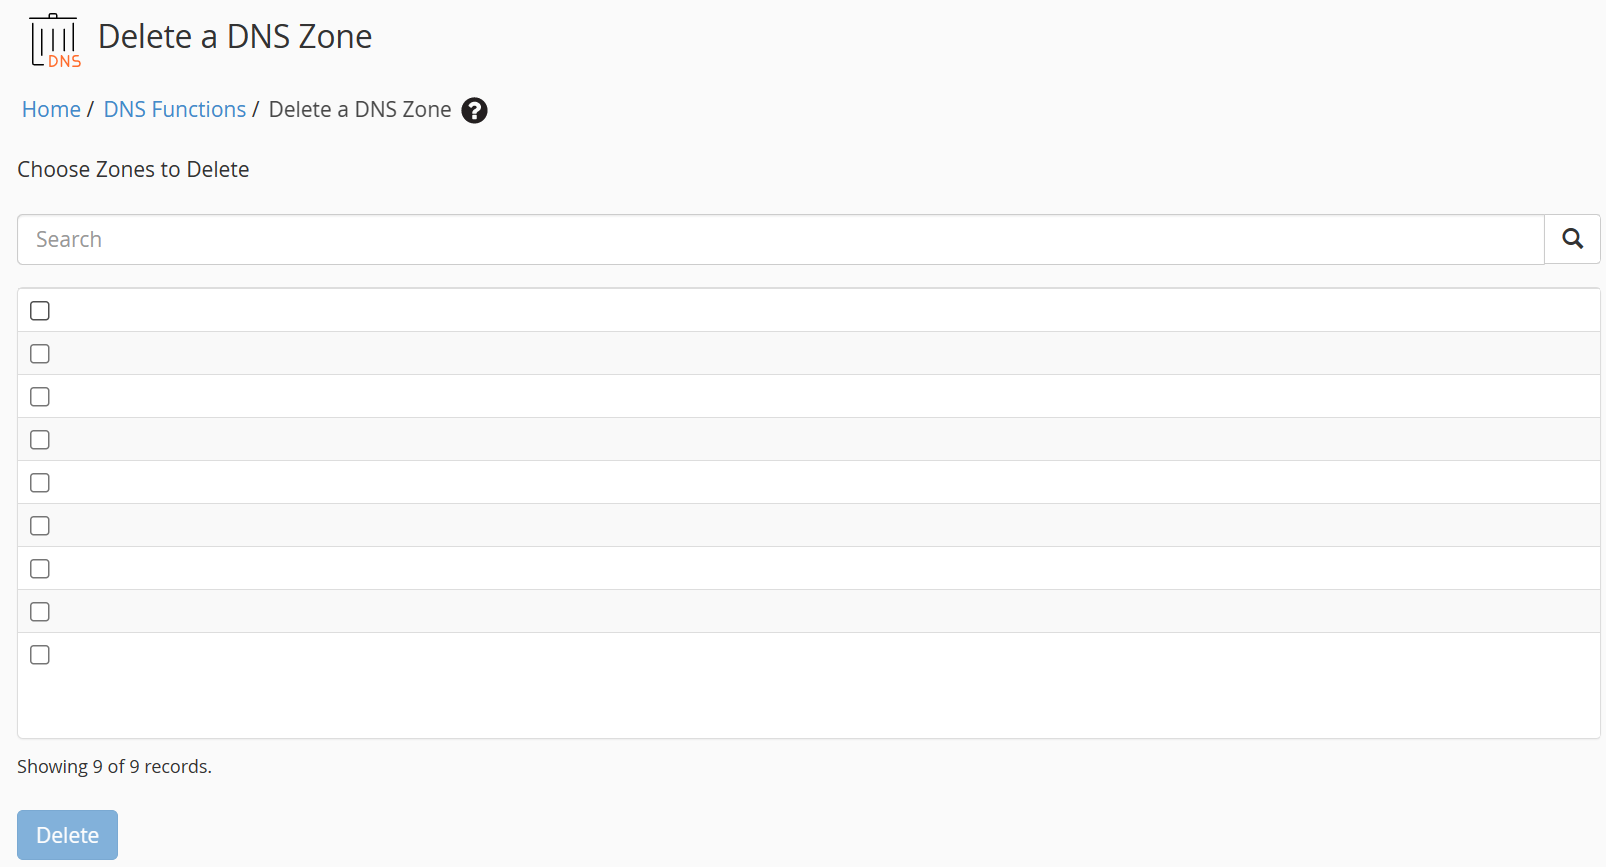
To delete a DNS zone of a domain, from the DNS function page, click on Delete a DNS Zone.

Select the domain you wish to delete the DNS zone for and tick the box. Then click the Delete button.
Need further assistance?
If you require further assistance please contact the ProStack team and we can help get this resolved for you! [Get in touch today!]

![]()
![]()
![]()
